In this tutorial you will learn How to implement Laravel 10 Authentication System using Laravel Breeze. Laravel Breeze provides out of the box authentication features like Register, Login, Edit Profile, Change Password, Delete Account, Confirm Password.
What is Laravel Breeze?
Laravel Breeze is a minimal, simple implementation of all of Laravel’s authentication features, including login, registration, password reset, email verification, and password confirmation. In addition, Breeze includes a simple “profile” page where the user may update their name, email address, and password.
Installing Laravel
First we will install Laravel 10, so open your terminal & add below command inside it .
laravel new laravel_breeze_auth
Creating a Database
After installing Laravel 10, we will create a database for our Laravel 10 authentication app. So, open phpMyAdmin & create a database : Here I will create a database called laravel_breeze_auth
Now, open the project in any code editor, open .env file and add database name inside it :
DB_CONNECTION=mysql
DB_HOST=127.0.0.1
DB_PORT=3306
DB_DATABASE=laravel10_breeze_auth
DB_USERNAME=root
DB_PASSWORD=
Installing Laravel Breeze
Now we will install Laravel breeze. Open your terminal and add below command :
composer require laravel/breeze –dev
Now we will run the breeze:install Artisan command. This command publishes the authentication views, routes, controllers, and other resources to your application.
Laravel Breeze publishes all of its code to your application so that you have full control and visibility over its features and implementation.
The breeze:install command will prompt you for your preferred frontend stack and testing framework:
Enter below command in your terminal :
php artisan breeze:install
You will see prompts : Which Breeze stack would you like to install?
In this tutorial we will use Laravel Blade with Alpine so type blade & press enter.
Now you will see another prompt :
Would you like dark mode support?(yes/no)[no]
Type yes and press enter
Now last prompt will be displayed as below :
Which testing framework do you prefer?[PHPUnit]
Type 0 for PHPUnit or type 1 for Pest.
Now it will take some time to install the dependencies.
Migrate the database
Now we will migrate the database. Enter below command to migrate the database :
php artisan migrate
Now type the below command to install npm packages.
npm install
Now we need to build the files, so enter below command and press enter, we need to keep it running so that when we make any changes in our stylesheet we don’t have to reload.
npm run dev
Now we need to run our Laravel app, so in your terminal enter below command to run the app.
php artisan serve
Now Open your browser and type http://localhost:8000
You will see that Laravel welcome page is displayed with two links for Login & Register.
Register a user
Now click on Register link, enter Name, Email Password & click on Register button. You will see Dashboard Page.
Edit Profile
On right side You will see a dropdown menu with your Name, Profile for Editing Profile & Logout for Logging out. Now click on Profile link. You will see Profile page. There are three sections : Update Profile Information, Update Password & Delete Account.
In Update Profile Information, you can update your name & email address.
In Update Password section, you can update your password.
In Delete Account section you can delete your account permanently.
Verify Email
Laravel provides verify middleware, We will implement Verify Email feature in our app, so that the user will be able to see the dashboard only if he verifies his email address.
To implement the VerifyEmail address we will use mailtrap for sending & receiving emails.
Open https://mailtrap.io/ and register with your details, you will get test inbox with your credentials like Host, Port, Username, Password:
After registering, to check your credentials click on the “Show Credentials” button.
Here you will see your credential details.
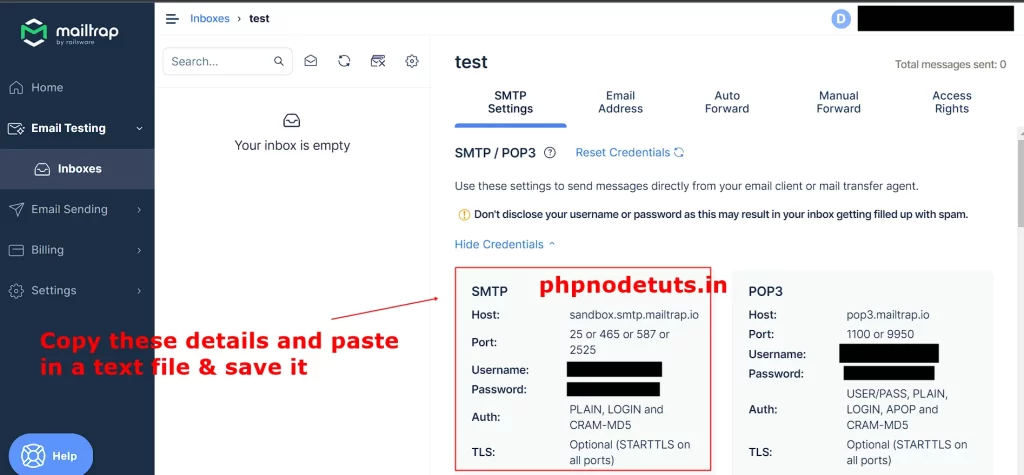
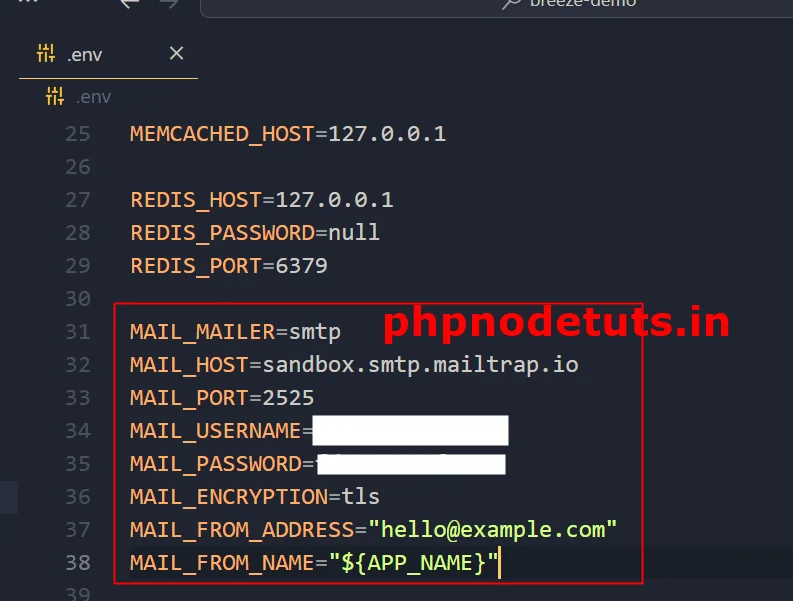
Now we need to enter these details inside .env file.
Open .env file and in the MAIL section enter username, password & other details as shown below .
MAIL_MAILER=smtp
MAIL_HOST=sandbox.smtp.mailtrap.io
MAIL_PORT=2525
MAIL_USERNAME=your mailtrap username
MAIL_PASSWORD=your mailtrap password
MAIL_ENCRYPTION=tls
MAIL_FROM_ADDRESS="hello@example.com"
MAIL_FROM_NAME="${APP_NAME}"
Open web.php file & you can see that auth & verified middlewares are applied to the dashboard route.
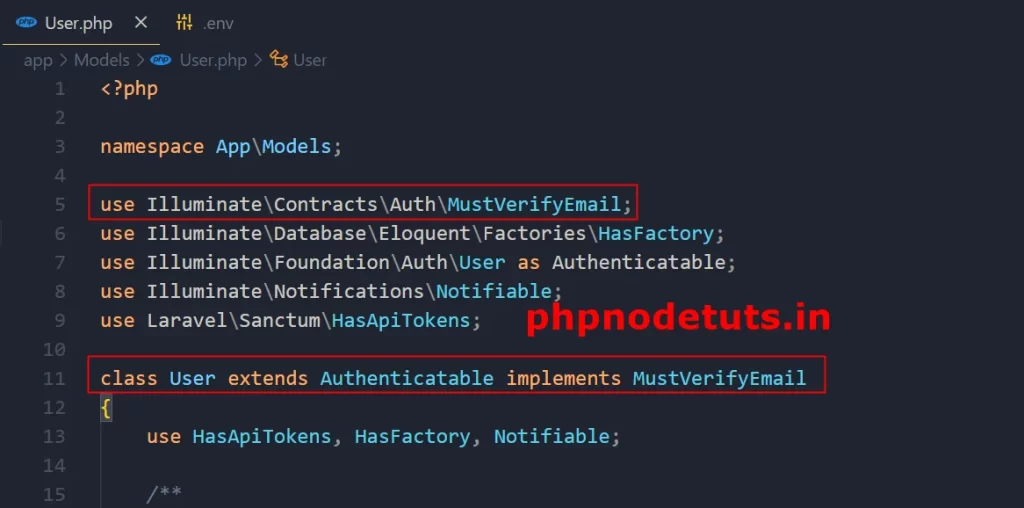
Now to implement the Verify Email feature in our app, we need to use MustVerify EmailInterface.
To do this open User model which is inside App/Models directory.
Here in the start you can see MustVerifyEmail is commented, so first uncomment this line :
use Illuminate\Contracts\Auth\MustVerifyEmail;
Now we need to use the MustVerifyEmail interface using implements keyword.
Add implements MustVerifyEmail to the User class as below :
class User extends Authenticatable implements MustVerifyEmail
Now try to open Dashbord page , you will see verify email page.
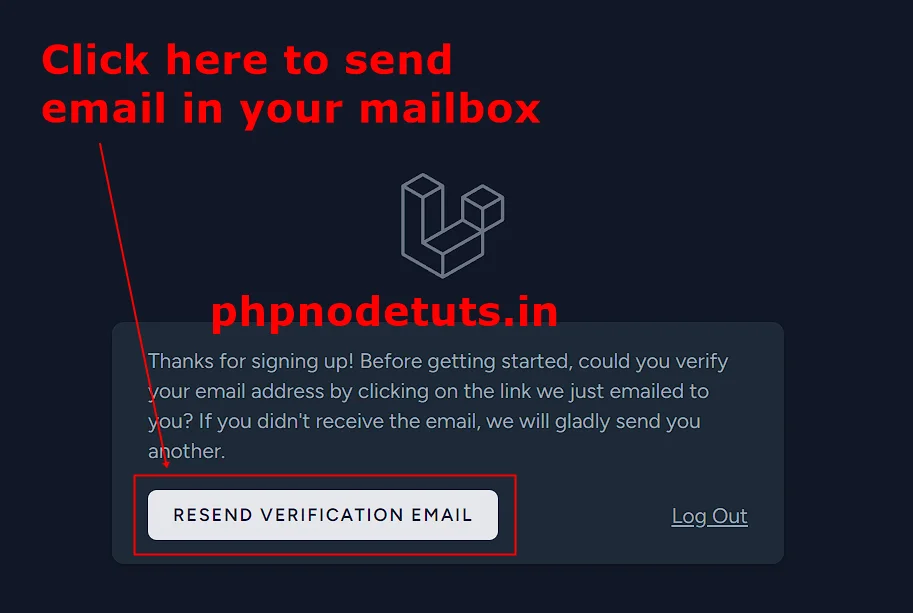
Click on Resend Verification Email button and it will send an email to your mailtrap inbox.
Top Laravel Interview Questions And Answers[2023]
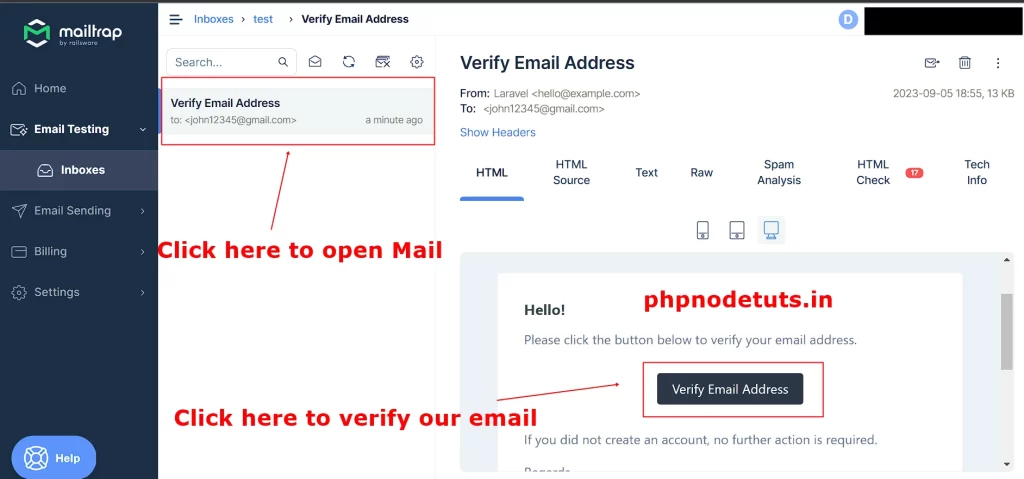
Now open your mail inbox in mailtrap , you will see an Email. Open it & click on the Verify Email Address button and you will be redirected to your Dashboard page.
Forgot Password
Laravel Breeze provides forgot Password feature out of the box.
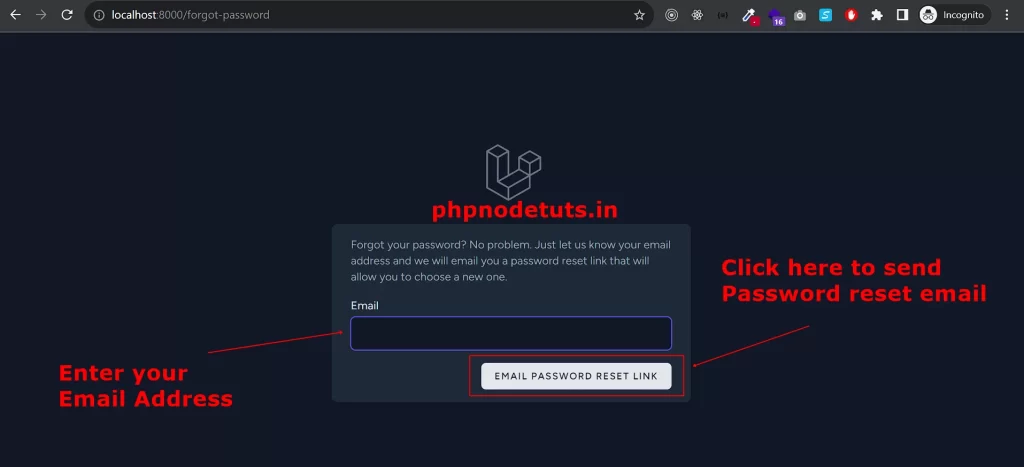
Open login page and you will see Forgot Your Password link. Click on the link and you will see Forgot Password page. Now enter your email address and Click on “Email Password Reset Link” button.
Now check your Mailtrap inbox and you will see and email called “Reset Password Notification”.
Click on the Reset Password button and you will be redirected to Reset Password Page.
Now enter your new password & confirm your password and click on Reset Password button, you will be redirected to the login page with success message “Your password has been reset”.
Password Confirmation
Laravel Breeze ships with password confirmation feature. This feature allows you to attach a password.confirm middleware to routes where you want a user to re-confirm their password.
Create a secret.blade.php blade view inside resources/views directory.
Now copy the below code & paste it inside this page.
<x-app-layout>
    <x-slot name="header">
        <h2 class="font-semibold text-xl text-gray-800 dark:text-gray-200 leading-tight">
            {{ __('Secret Page') }}
        </h2>
    </x-slot>

    <div class="py-12">
        <div class="max-w-7xl mx-auto sm:px-6 lg:px-8">
            <div class="bg-white dark:bg-gray-800 overflow-hidden shadow-sm sm:rounded-lg">
                <div class="p-6 text-gray-900 dark:text-gray-100">
                    {{ __("This is a secret page") }}
                </div>
            </div>
        </div>
    </div>
</x-app-layout>
Now open web.php file and add a route for secret & add password.confirm middleware to this route :
Route::get('/secret', function () {
    return view('secret');
})->middleware(['auth', 'verified', 'password.confirm'])->name('secret');
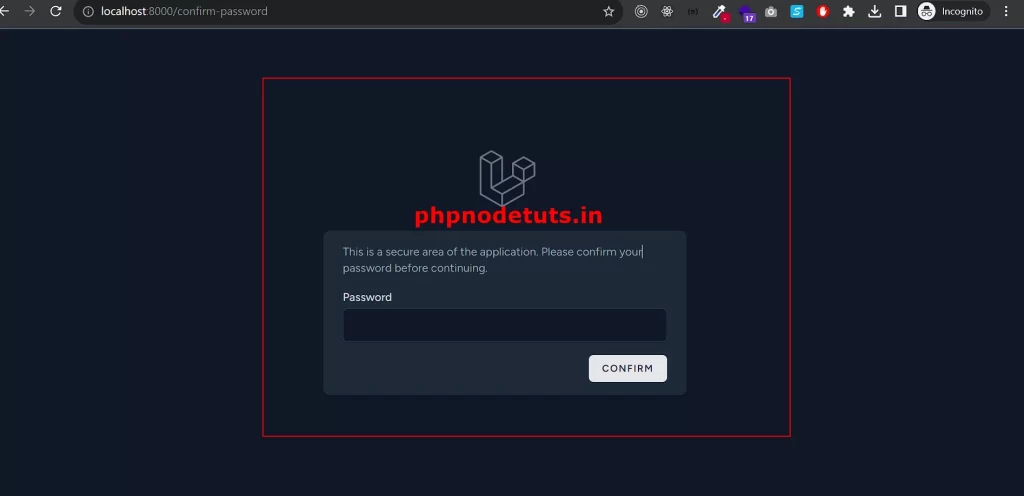
Now in your browser enter the url localhost:8000/secret
You will be prompted to confirm your password, similar to what you may have seen on other applications like GitHub:
Confirming the password will store a timestamp in the user’s session that lasts for three hours by default so users do not have to enter their password during that period again. You may customize this duration using a new password_timeout configuration option in the auth configuration file(config/auth.php).
In addition, a new password validation rule has been added to the framework. This validation rule may be used to validate that a given password matches the user’s existing password.
![Read more about the article Top Laravel Interview Questions And Answers[2023]](http://phpnodetuts.in/wp-content/uploads/2023/09/Laravel-Interview-Questions-and-Answers-300x169.webp)
