
What is Livewire?
Livewire is a full-stack framework for Laravel that makes building dynamic interfaces simple, without leaving the comfort of Laravel.
The latest version of Livewire 3 has just been released. In this tutorial I will teach you How to create a Livewire CRUD(CREATE,READ,UPDATE, DELETE) Application using Livewire 3.
In this Livewire 3 CRUD Tutorial you will learn, How to create CRUD (CREATE, READ, UPDATE, DELETE )application using the latest version of Livewire 3.
We will learn How to Create/Store data into the database, How to Read/View the data, How to Edit/Update the data & How to Delete the data from the database. We will create a fully Functional CRUD system using Livewire 3.
Livewire version 3 requires Laravel version 10 or later & php version 8.1 or later, so make sure you have these.
Install Laravel
First we will install Laravel 10.
In your drive, create a folder livewire_projects,
Now right click & click on “Open In Terminal “.

There are two ways to install Laravel, using composer create-project command or using laravel new command.
To install Laravel using Laravel new command, you need to install Laravel installer globally using the following command.
composer global require laravel/installer
Copy one of the below commands into your terminal & press enter to install Laravel.
composer create-project laravel/laravel your-project-name
Or
laravel new your-project-name
I have already installed Laravel installer globally, so I will use the below command to install Laravel.
laravel new livewire3_crud

It will take some time to download Laravel, depending on your Internet Connection. After the download completes you will see screen like below image.

Now type cd your-project-name & press enter.

Now to run the Laravel app, type below command & press enter.
php artisan serve

Open your browser & type localhost:8000 in your address bar, & you will see that Laravel app is running successfully.

Create A Database
Now, we will create a database for our project.
Type http://localhost/phpmyadmin in your browser to open phpMyAdmin.
Now click on New to create a Database.

Now enter your database name & click on create to create the database.


Now, open your project folder in your favourite IDE, here I am using VS Code so I will open this project in VS Code.


Now we need to enter database name in our project’s .env file.
LIVEWIRE 3 IMAGE CRUD TUTORIAL STEP BY STEP
So open .env file & enter the database name which you have created in phpMyAdmin.

Install Livewire 3
To install Livewire you will need Git Bash, if you use Windows Command Prompt or Windows Power Shell, you will get an error.
I have already installed Git Bash & configured it in VS Code so I will open GitBash in VS Code.
Click on Terminal-> New Terminal, it will open a Terminal.

Now click on the + icon which is in the right side & click on Gitbash to open Git Bash in VS Code.

Now type the following command in Git bash to install livewire.
composer require livewire/livewire:^3.0@beta
Livewire 3 stable version has been released recently, so instead of the above command use below command to install stable version of Livewire 3.
composer require livewire/livewire

It will take some time to install livewire, depending on your internet connection. After the download completes, it will display below screen.

Create a template layout
Now we need an HTML layout for our component to render inside. By default, Livewire will automatically look for a layout file named: resources/views/components/layout.blade.php
Open your terminal & type below command to create a layout for our App.
php artisan livewire:layout

This command will generate a file called app.blade.php in resources/views/components folder.

Now for styling we will use Tailwind Css cdn in our app.
So, open your app.blde.php layout file, which is in views->components->layouts folder & add tailwind css cdn before the </head> tag.
<script src="https://cdn.tailwindcss.com"></script>

Creating Post Model
We will now create a Post model for our database.
Open your terminal and enter below command, it will create a Post Model & create_posts_table migration file.
php artisan make:model Post -m

Here we are using -m flag which will automatically generate create_posts_table migration file.
Now we need to add fields in our migration file. Open create_posts_table migration file, which is inside database->migrations folder.
Now we will add two fields into our miration file, title & body .
The datatype of title will be string & the datatype of body field will be text.
Enter below lines after $table->id();
  $table->string('title');
  $table->text('body');
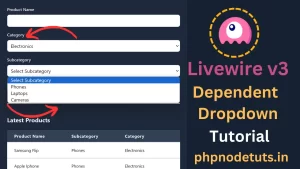
Laravel Livewire3 Dependent Dropdown Tutorial

Now we need to migrate the database, so enter the below command to migrate the database.
php artisan migrate

You will see the below screen after successful migration.

Creating Our First Livewire Component.
Now we will create our first Livewire Component.
Open your terminal and type the below command to create Post component.
php artisan make:livewire PostComponent

The above command will create two files, PostComponent.php class which is inside app-Livewire folder.
The second file is a post->component.blade.php file which is inside resources->views->livewire folder.

If you open the PostComponent.php file you can see that there is a render() method, which is used to display the post-component view file.

Creating Route
Now, we will create route for our application.
To create a route, open web.php file which is inside the routes folder.

Livewire allows you to assign components directly to a route in your Laravel application. These are called “full-page components”.
Add below code into your web.php file.
Route::get('/posts', PostComponent::class)->name('posts');

Enter the below code in web.php file after <?php tag
use App\Livewire\PostComponent;

Open post-component.blade.php file and enter <h1>Posts<h1>.

Now when you open localhost:8000/posts url it will display/render the data from post-component.blade.php file, it will show the below page.

If the above page displays, it means that Livewire is installed successfully.
Now open PostComponent.php file and enter below code inside component class
public $isOpen = 0;

    public function create()
    {
        $this->openModal();
    }
    public function openModal()
    {
        $this->isOpen = true;
    }
    public function closeModal()
    {
        $this->isOpen = false;
    }

In the above code, we have we have defined public $isOpen = 0, It means that by default the modal will be closed.
public function create(): This method is likely called when you want to open the modal window to create a new item or perform some action. It typically triggers the openModal() method to set the isOpen property to true, indicating that the modal should be shown on the post.component.blade view.
public function openModal(): This method sets the isOpen property to true, indicating that the modal is open or visible. When the isOpen property is true, the Livewire component will render the modal in the post.component.blade view.
public function closeModal(): This method is responsible for closing the modal window. It sets the isOpen property to false, indicating that the modal should be hidden or closed. When the isOpen property is false, the Livewire component will not render the modal in the post.component.blade view.
LIVEWIRE 3 CRUD TUTORIAL USING BOOTSTRAP 5
Now, open the post-component.blade file and enter the below code inside the <div></div> tag.
<div class="py-12">
        <div class="max-w-7xl mx-auto sm:px-6 lg:px-8 space-y-6">
            <div class="p-4 sm:p-8 bg-white shadow sm:rounded-lg">
                <div class="max-w-xl">
                <section>
                    <div class="my-4">
                        <button class="bg-blue-500 hover:bg-blue-700 text-white font-bold py-2 px-4 rounded" wire:click="create">Add Post</button>
                    </div>
                    @if($isOpen)
                    <div class="fixed inset-0 flex items-center justify-center z-50">
                        <div class="absolute inset-0 bg-black opacity-50"></div>
                        <div class="relative bg-gray-200 p-8 rounded shadow-lg w-1/2">
                            <!-- Modal content goes here -->
                            <svg wire:click.prevent="$set('isOpen', false)"
                            class="ml-auto w-6 h-6 text-gray-900 dark:text-gray-900 cursor-pointer fill-current" xmlns="http://www.w3.org/2000/svg" viewBox="0 0 18 18">
                           <path d="M14.53 4.53l-1.06-1.06L9 7.94 4.53 3.47 3.47 4.53 7.94 9l-4.47 4.47 1.06 1.06L9 10.06l4.47 4.47 1.06-1.06L10.06 9z" />
                       </svg>
                            <h2 class="text-2xl font-bold mb-4">Create Post</h2>
                            <form>
                                <div class="mb-4">
                                    <label for="title" class="block text-gray-700 font-bold mb-2">Title:</label>
                                    <input type="text" id="title" class="w-full border border-gray-300 px-4 py-2 rounded">
                                </div>
                                <div class="mb-4">
                                    <label for="body" class="block text-gray-700 font-bold mb-2">Body:</label>
                                    <textarea id="body" rows="4" class="w-full border border-gray-300 px-4 py-2 rounded"></textarea>
                                </div>
                                <div class="flex justify-end">

                                    <button type="submit" class="bg-green-500 hover:bg-green-600 text-white font-bold py-2 px-4 rounded mr-2">Save</button>
                                    <button type="button" class="bg-red-500 hover:bg-red-600 text-white font-bold py-2 px-4 rounded" wire:click="closeModal">Cancel</button>
                                </div>
                            </form>

                        </div>
                    </div>
                    @endif
                </section>
                </div>
            </div>
        </div>
    </div>
In the above code we have added a button to add a Post.
We have added a click event wire:click=”create” on the button, which will open the modal.
We have added closeModel method on the cancel button, which will used to close the modal.
protected $fillable = ['title','body'];

Now open PostComponent.php file and enter the below code before the create method.
#[Rule('required|min:3')]
    public $title;

    #[Rule('required|min:3')]
    public $body;

Here we have $title & $body are two variables which are publicly available.
The above code #[Rule(‘required|min:3’)], is a new feature in Livewire v3, which is used for validation.
The above code says that the field is required & minimum 3 charaters are required for this field.
To use this we need to import the below code above.
use Livewire\Attributes\Rule;
Creating Data
Now, to store the data into the database, we will add the below method after the create method.
public function store()
    {
        $this->validate();
        Post::create([
            'title' => $this->title,
            'body' => $this->body,
        ]);
        session()->flash('success', 'Post created successfully.');

        $this->reset('title','body');
        $this->closeModal();
    }
Make sure to import the Post model, before the class.
use App\Models\Post;

In the above store() method, $this->validate() will validate the data.
The Post::create() method will create a new instance of the Post model and saves it to the database.
session()->flash(‘success’, ‘Post created successfully.’);
The above code will display a flash message on the post.component.blade file.
$this->closeModal(); This will close the modal.
$this->reset(); This line calls the reset method, which is another built-in Livewire method used to reset the component’s properties to their initial state. In this context, it clears the title and body properties, making the form fields empty after the post is successfully created.
Now we need to make the Form component work, we need to add wire:model directive & the store() method, so that when the user enter the data in title & body field the data gets inserted into the database, and the modal gets closed.
Open post-component.blade.php file & enter the below code.
In the title input enter wire:model=”title” and in the body textarea input enter wire:model=”body”.
   <input type="text" wire:model="title" id="title" class="w-full border border-gray-300 px-4 py-2 rounded">

<textarea wire:model="body" id="body" rows="4" class="w-full border border-gray-300 px-4 py-2 rounded"></textarea>
Now enter the below code in form tag.
<form wire:submit="store">

Now open localhost:8000/posts in your browser,
Click on Add Button, it will open the Modal.

Now enter title & body and click on save button.

Now open phpMyAdmin and check the database, you will see data into the posts table.

You may have noticed that the success message didn’t get displayed after the data has been inserted.
To display the success message, open post-component.blade.php file and enter below code after the section tag
@if (session()->has('success'))
    <div class="relative flex flex-col sm:flex-row sm:items-center bg-gray-200 dark:bg-green-700 shadow rounded-md py-5 pl-6 pr-8 sm:pr-6 mb-3 mt-3">
        <div class="flex flex-row items-center border-b sm:border-b-0 w-full sm:w-auto pb-4 sm:pb-0">
            <div class="text-green-500" dark:text-gray-500>
                <svg class="w-6 sm:w-5 h-6 sm:h-5" fill="none" stroke="currentColor" viewBox="0 0 24 24" xmlns="http://www.w3.org/2000/svg"><path stroke-linecap="round" stroke-linejoin="round" stroke-width="2" d="M9 12l2 2 4-4m6 2a9 9 0 11-18 0 9 9 0 0118 0z"></path></svg>
            </div>
            <div class="text-sm font-medium ml-3">Success!.</div>
        </div>
        <div class="text-sm tracking-wide text-gray-500 dark:text-white mt-4 sm:mt-0 sm:ml-4"> {{ session('success') }}</div>
        <div class="absolute sm:relative sm:top-auto sm:right-auto ml-auto right-4 top-4 text-gray-400 hover:text-gray-800 cursor-pointer">
            <svg class="w-4 h-4" fill="none" stroke="currentColor" viewBox="0 0 24 24" xmlns="http://www.w3.org/2000/svg"><path stroke-linecap="round" stroke-linejoin="round" stroke-width="2" d="M6 18L18 6M6 6l12 12"></path></svg>
        </div>
    </div>
@endif

Now if you try to add the Post, you will see a success message after the data gets inserted into the database.

To display the error messages, enter the below code after input title :
<span class="text-red-500">@error('title') {{ $message }} @enderror</span>
Enter the below code after textarea
<span class="text-red-500">@error('body') {{ $message }} @enderror</span>

You can see that now if you try to submit the form, without entering data, it will display error messages.
You may notice that when we click on the Cancel button, the validation messages are not cleared.
To fix this open PostComponent.php file and add below code in the openModal() method.
$this->resetValidation();

Now to display data add the below code in the render method.
  public function render()
    {
        return view('livewire.post-component',[
            'posts' => Post::all()
        ]);
    }

Now in the post-component.blade.php file add the below code after the </section> tag to display post title and body in the table.
<div class="relative overflow-x-auto shadow-md sm:rounded-lg mt-3">
                    <table class="w-full text-sm text-left text-gray-500 dark:text-gray-400">
                        <thead class="text-xs text-gray-700 uppercase bg-gray-50 dark:bg-gray-700 dark:text-gray-400">
                            <tr>
                                <th scope="col" class="px-6 py-3">
                                    Title
                                </th>
                                <th scope="col" class="px-6 py-3">
                                    Body
                                </th>
                                <th scope="col" class="px-6 py-3">
                                    Action
                                </th>
                            </tr>
                        </thead>
                        @forelse ($posts as $post)
                        <tbody wire:key="{{ $post->id }}>
                            <tr class="bg-white border-b dark:bg-gray-900 dark:border-gray-700">
                                <th scope="row" class="px-6 py-4 font-medium text-gray-900 whitespace-nowrap dark:text-white">
                                    {{$post->title}}
                                </th>
                                <td class="px-6 py-4">
                                    {{$post->body}}
                                </td>

                                <td class="px-6 py-4">
                                    <button class="">
                                        <svg xmlns="http://www.w3.org/2000/svg" fill="none" viewBox="0 0 24 24" stroke-width="1.5" stroke="currentColor" class="ml-2 mt-0 w-4 h-4">
                                            <path stroke-linecap="round" stroke-linejoin="round" d="M16.862 4.487l1.687-1.688a1.875 1.875 0 112.652 2.652L6.832 19.82a4.5 4.5 0 01-1.897 1.13l-2.685.8.8-2.685a4.5 4.5 0 011.13-1.897L16.863 4.487zm0 0L19.5 7.125" />
                                          </svg>
                                    </button>

                        <button class="">
                            <svg xmlns="http://www.w3.org/2000/svg" fill="none" viewBox="0 0 24 24" stroke-width="1.5" stroke="currentColor" class="ml-2 mt-0 w-4 h-4">
                                <path stroke-linecap="round" stroke-linejoin="round" d="M14.74 9l-.346 9m-4.788 0L9.26 9m9.968-3.21c.342.052.682.107 1.022.166m-1.022-.165L18.16 19.673a2.25 2.25 0 01-2.244 2.077H8.084a2.25 2.25 0 01-2.244-2.077L4.772 5.79m14.456 0a48.108 48.108 0 00-3.478-.397m-12 .562c.34-.059.68-.114 1.022-.165m0 0a48.11 48.11 0 013.478-.397m7.5 0v-.916c0-1.18-.91-2.164-2.09-2.201a51.964 51.964 0 00-3.32 0c-1.18.037-2.09 1.022-2.09 2.201v.916m7.5 0a48.667 48.667 0 00-7.5 0" />
                              </svg>

                        </button>
                                </td>
                            </tr>

                        </tbody>
                        @empty
                    <p>No post found</p>
                @endforelse
                    </table>
                </div>
In the above code we have used Laravel forelse loop to loop the data.
Pagination
Now to add pagination, open PostComponent.php file & add use WithPagination trait.
Don’t forget to import withPagination trait above.
use Livewire\WithPagination;

In the render method, add the below code.
public function render()
    {
        return view('livewire.post-component',[
            'posts' => Post::paginate(5),
        ]);
    }

The above code will display 5 records per page.
Now open post-component.blade.php file and add the below code after the </table> tag
{{ $posts->links() }}
Now enter 10-20 records into the database & you will see pagination links.

Now for updating & deleting post, we need post id.
In the PostComponent file add the below code for post id.
public $postId;

Editing Data
Now we will create edit() method, which will be used to display the old data into the title & textarea for update. Add below code after the store() method
public function edit($id)
    {
        $post = Post::findOrFail($id);
        $this->postId = $id;
        $this->title = $post->title;
        $this->body = $post->body;

        $this->openModal();
    }

Now open post-component.blade.php file and enter the below code in <h2></h2>tag
<h2 class="text-2xl font-bold mb-4">{{ $postId ? 'Edit Post' : 'Create Post' }}</h2>
In the form tag add below code :
<form wire:submit.prevent="{{ $postId ? 'update' : 'store' }}">
In the Save button add the following code.
{{ $postId ? 'Update' : 'Create' }}

Now enter the below code into the edit button.
wire:click="edit({{ $post->id }})"

When the edit button is clicked, the modal will be opened with the data from the database.
Now if you click on the Edit button it will open the modal with the data.
You can see that the title has also been changed to Edit Post.
When we click on the Edit button & then try to click on the Create button, instead of Create Form, Edit Form is displayed. To fix this replace create() method with below code :
 public function create()
    {
        $this->reset('title','body','postId');
        $this->openModal();
    }

Updating Data
Now we need to update the existing data.
In the PostComponent file add below code after edit() method.
public function update()
    {
        if ($this->postId) {
            $post = Post::findOrFail($this->postId);
            $post->update([
                'title' => $this->title,
                'body' => $this->body,
            ]);
            session()->flash('success', 'Post updated successfully.');
            $this->closeModal();
            $this->reset('title', 'body', 'postId');
        }
    }
Now click on the edit button, and try to update a record. You can see that the record is updated successfully.

Deleting Data
Now we need to delete data.
In the PostComponent, add the below code, after update() method.
  public function delete($id)
    {
        Post::find($id)->delete();
        session()->flash('success', 'Post deleted successfully.');
        $this->reset('title','body');
    }
Now in the post-component.blade.php file enter the below code in delete button :
<button class="" wire:click="delete({{ $post->id }})">

Now click on the delete icon/button & you can see that the data is deleted.

Extracting a form object
If you are working with a large form and prefer to extract all of its properties, validation logic, etc., into a separate class, Livewire offers form objects. Form objects allow you to re-use form logic across components and provide a nice way to keep your component class cleaner by grouping all form-related code into a separate class. You can either create a form class by hand or use the convenient artisan command:
php artisan livewire:form PostForm
It will create a file called PostForm in Livewire/Forms Folder.
Now copy the below code & paste it into the PostForm.php file.
<?php

namespace App\Livewire\Forms;

use App\Models\Post;
use Livewire\Attributes\Rule;
use Livewire\Form;

class PostForm extends Form
{
    #[Rule('required|min:3')]
    public $title;

    #[Rule('required|min:3')]
    public $body;

    public function save()
    {
        Post::create([
            'title' => $this->title,
            'body' => $this->body,
        ]);
    }
}
Here we are adding the validation rules & creating a save method, for creating a post which we will call in the PostComponent.
Now open PostComponent.php & remove the below validation rules from it, as we have defined the validation rules into the PostForm.
#[Rule('required|min:3')]
   public $title;

   #[Rule('required|min:3')]
    public $body;
Now we need to use PostForm, so import PostForm in PostComponent file.
public PostForm $form;
Do not forget to import PostForm.
use App\Livewire\Forms\PostForm;
Now we need to make some changes :
Replace the create(), store() ,edit() & update() method with below code
 public function create()
    {
        $this->reset('form.title','form.body', 'postId');
        $this->openModal();
    }
public function store()
    {
        $this->validate();
        $this->form->save();
        session()->flash('success', 'Post created successfully.');
        $this->reset('form.title','form.body');
        $this->closeModal();
    }
 public function edit($id)
    {
        $post = Post::findOrFail($id);
        $this->postId = $id;
        $this->form->title = $post->title;
        $this->form->body = $post->body;

        $this->openModal();
    }
 public function update()
    {
        if ($this->postId) {
            $post = Post::findOrFail($this->postId);
            $post->update([
                'title' => $this->form->title,
                'body' => $this->form->body,
            ]);
            $this->postId='';
            session()->flash('success', 'Post updated successfully.');
            $this->closeModal();
            $this->reset('form.title','form.body');
        }
    }
Now we need to make some changes into the post-component.blade.php file.
In the form, replace inputs with below code :
  <div class="mb-4">
                                <label for="title" class="block text-gray-700 font-bold mb-2">Title:</label>
                                <input type="text" wire:model="form.title" id="title" class="w-full border border-gray-300 px-4 py-2 rounded">
                                <span class="text-red-500">@error('form.title') {{ $message }} @enderror</span>
                            </div>
                            <div class="mb-4">
                                <label for="body" class="block text-gray-700 font-bold mb-2">Body:</label>
                                <textarea id="body" wire:model="form.body" rows="4" class="w-full border border-gray-300 px-4 py-2 rounded"></textarea>
                                <span class="text-red-500">@error('form.body') {{ $message }} @enderror</span>
                            </div>
Try to add, update or delete a record & you will see its working like a charm!
Confirmation before deleting
To show a confirm dialog, you can use sweet alert or show a modal.
Here we will show simple javascript confirm box before deleting the record.
Replace the delete button code with the below code :
  <button type="button" class=""
                        onclick="return confirm('Are you sure you want to delete this item?') || event.stopImmediatePropagation()" wire:click="delete({{ $post->id }})"">
                        <svg xmlns="http://www.w3.org/2000/svg" fill="none" viewBox="0 0 24 24" stroke-width="1.5" stroke="currentColor" class="ml-2 mt-0 w-4 h-4">
                            <path stroke-linecap="round" stroke-linejoin="round" d="M14.74 9l-.346 9m-4.788 0L9.26 9m9.968-3.21c.342.052.682.107 1.022.166m-1.022-.165L18.16 19.673a2.25 2.25 0 01-2.244 2.077H8.084a2.25 2.25 0 01-2.244-2.077L4.772 5.79m14.456 0a48.108 48.108 0 00-3.478-.397m-12 .562c.34-.059.68-.114 1.022-.165m0 0a48.11 48.11 0 013.478-.397m7.5 0v-.916c0-1.18-.91-2.164-2.09-2.201a51.964 51.964 0 00-3.32 0c-1.18.037-2.09 1.022-2.09 2.201v.916m7.5 0a48.667 48.667 0 00-7.5 0" />
                          </svg>
                        </button>
Now you will see a confirmation box before deleting a Record.

Now you have a complete Livewire 3 CRUD Application.


Hello,
if you first edit a post and then try to create one, the update button appears, in the UPDATE function you have to add $this->postId=”;
Greetings
Thanks.
I have upodated the Post 🙂
Goog!!!!
Excellent tutorial
so nice tuts, thank you and i will subscribe to your channel.
Thanks 🙂
Mind blowing tutorial. ❤️❤️❤️ Livewire3.0 will change the javascript world for building SPA application without leaving PHP. Please make tutorial on wire:navigate. Thanks😍😍
Thanks 🙂
Yes Livewire 3.0 is just awesome 😉
Thanks,
Request: Please make tutorial on Livewire 3.0 With Bootstrap5.
okay…keep visiting.
Hello. In the future, there will be a Livewire 3 CRUD with Livewire PowerGrid integration?
Okay..noted 🙂
thanks i will wait
Excellent tutorial.
Small remark: you also have to validate the input in the update() method.
Albert
Thanks for your comment. I will update the post. 🙂
Excellent explanations!
Was a Github repository created for the project?
Sorry, I haven’t created a Github repo for this project